OpenStreetMap

SomeoneElse's Diary

Recent diary entries

Taginfo is a way of finding out what tags and values are used within OpenStreetMap. There’s a worldwide instance here, and other instances exist, including various Geofabrik ones such as Antarctica here.

As well as describing keys and values used within OpenStreetMap, the worldwide instance of Taginfo also holds details of what other projects use particular OSM tags. The Taginfo/Projects page explains the update process.

Each project submits a .json file containing details of key and value usage, such as this one for an OSM Mug.

The one for the map style that I look after is here. Currently I’ve just submitted a list of keys, not values, but I have included a description for each one, as can be seen here for “designation”.

The first challenge was to create the initial list. There are references to tags in three main places in my map style - the lua style file, the carto .mml file and the individual carto .mss files such as this one. A bit of investigation (creating a unique sorted list of strings within style.lua on one hand and .mml and .mss files on the other found that although some keys do pass through style.lua unchanged, almost no keys that are later used in carto files aren’t mentioned in style.lua at all. That means that I only needed to worry about keys in style.lua. I created an initial .json in the correct format and then wrote a shell script to generate the “tags:” section of the .json file. I then filled in the descriptions where the shell script had just created placeholders, and checked it in.

Next, I wanted to be able to easily update the taginfo.json file after changes to the map style. Because I’ve also checked the previous generated file into github I can easily create a new one and compare the two:

sh -x ./taginfo_lua_genkeylist.sh > q.txt
diff taginfo_lua_nodesc.txt q.txt

for the most recent change the output of that is:

44a45
>     { "key": "colour", "description": "qqq" }
118a120
>     { "key": "lifeguard", "description": "qqq" }
119a122
>     { "key": "locked", "description": "qqq" }
163a167
>     { "key": "place_of_worship", "description": "qqq" }

So next I need to:

  • Update the file with descriptions with those keys (taking care to make sure that the JSON is still valid, and that lines which need a comma on the end have one).
  • Move the new output file (q.txt) in this example into place as the new “taginfo_lua_nodesc.txt”.
  • Update taginfo.json with a new “data_updated” date at the top.
  • Check everything in
  • Ensure that within a day or so it’s updated in the project list.

In some cases the description can be obtained directly from the commit text, such as for “colour” here:

Show black, white, blue, green, grey and gold phone boxes as the correct colour rather than red.

Once that’s done, taginfo should update within a day or so, and updates will appear on pages such as this one. At the time of writing this diary entry, there are no projects listed for that key.

Then in a month or so’s time, after the next map style update, repeat the process.

Location: Old Town, Hull, Kingston upon Hull, England, HU1 1JE, United Kingdom

Adding a resource to the OpenStreetMap Community Index

Posted by SomeoneElse on 7 February 2021 in English. Last updated on 14 June 2022.

The OpenStreetMap Community Index is designed to show people what community groups there are within OpenStreetMap, in any part of the world. If I look near me I see a local pub meeting (sadly on hold during the pandemic), some country-level resources, and then international resources.

On a couple of occasions I’ve seen things that are missing or need updating, and this diary entry is designed to complement the existing documentation to describe what needs to be done to fix that.

Creating a local copy

In my case I already have a fork of https://github.com/osmlab/osm-community-index at https://github.com/SomeoneElseOSM/osm-community-index. There’s a “fork” button in the top right of Github’s UI that allows you to do this.

Next, I’ll create a local branch to work on. The default branch at https://github.com/SomeoneElseOSM/osm-community-index is “main” and the UI will say “This branch is even with osmlab:main.” because (in your case) you’ve only just created it. In github’s branch selector just type the name of the new branch to create. In this case I created “add_forum_at_world_level”, because I noticed that there wasn’t a link to the OSM Forum at the international level, although there are many links to country-level forums from the community index.

Next, “git clone” your repository wherever it is you want to work. I’m working on a completely new virtual machine to do this, so I have to take a slight detour first - see “setting up ssh access to github” below. Once that’s done:

mkdir ~/src
cd ~/src
git clone git@github.com:SomeoneElseOSM/osm-community-index.git
git checkout add_forum_at_world_level

Note that I’ve used a version of “git clone” that is designed to work with ssh. Github is (rightly) moving away from password-based verification and will send you a warning email if you try and use a password during the transfer period.

To make sure that everything works before making any changes, we’ll build everything as it currently stands. The machine I’m running on is a virtual server running Ubuntu 20.04 LTS. It’s actually set up as per here so it already has Apache2 and some node.js software on it. The versions of node.js and npm are the defaults for this version of Ubuntu, and are:

node -v
v10.19.0
npm -v
6.14.4

An older OS with and older version of node.js or npm may struggle, and I’m not going into detail about node.js versions or package managers here, because it’s way above my pay grade.

cd ~/src/osm-community-index
npm install
npm run test

That checks that everything is OK. To build as is:

npm run build
npm run dist

That creates various files in e.g. ~/src/osm-community-index/dist/ including “completeFeatureCollection.min.json” (in previous versions called “combined.min.geojson”), which is all the data needed by the website as it runs. On my server “/var/www/html” is the root of the website. To copy the files into there:

sudo mkdir /var/www/html/community
sudo cp ~/src/osm-community-index/docs/index.html /var/www/html/community/
sudo cp ~/src/osm-community-index/dist/completeFeatureCollection.min.json /var/www/html/community/

Next, we’ll need to edit the “index” file on the web site so that it refers to the local “completeFeatureCollection.min.json”, not one from an external webserver.

sudo nano /var/www/html/community/index.html

In my case I’ll edit it so that:

var dataURL = 'http://192.168.1.66/community/completeFeatureCollection.min.json';

and restart apache:

sudo /etc/init.d/apache2 restart

If I browse to http://192.168.1.66/community/ the site looks exactly like the real one.

Adding a new feature

Next, we’ll make a change. This document describes the format in detail. In my case I want to create a “resource” at world level (“OpenStreetMap Forum”) but don’t need to create a “feature” since my new resource is worldwide.

If you think you might have to add a feature please check https://ideditor.codes first (iD and the community index share this). It is quite possible that your region may be already listed, since quite a few unusual values are already there. There are a couple of other caveats to be aware of as well.

I created my new .json file based on one of the other international examples. For “languageCodes” I chose “en” because most (though not all) of the posts at supranational level are in English. “contacts” is a bit complicated, since there are many top-level OSM forums and they don’t all have the same admins. I chose an address that I knew would at least result in messages being passed on to the right admin(s). For “order” I chose “something in the middle of the list”. The current top-level order settings are:

Facebook  3
Reddit    2
Discord   unset
Telegram  unset
Twitter   unset
OSMF      unset
Help      -2
IRC       -4

Given OSMF’s FOSS policy, I’m not convinced that Facebook should be at the top of that list, but that’s another issue for another time. Once all changes have been made, build again:

npm run build

Any errors with field contents should be displayed here. Fix this and run “npm run build” again before continuing. When complete:

npm run dist
sudo cp ~/src/osm-community-index/dist/completeFeatureCollection.min.json /var/www/html/community/
sudo /etc/init.d/apache2 restart

Now, when I browse to http://192.168.1.66/community/ the new entry appears. We’re ready to check in the changes. The current status of things can be seen via:

git status

To check in:

git add resources/world/OSM-Forum.json
git add .
git commit

“git commit” does a local update from “files you have edited locally” to “your local copy of the git repository on this server”. Next:

git push

That updates your github copy of the community index with the copy from your local server.

At this point, the branch in my github account says “This branch is 1 commit ahead of osmlab:main.” when I browse to it.

Creating a pull request

There’s an option from there to create a pull request, which is saying to the maintainers of https://github.com/osmlab/osm-community-index “hello, I think it’d be a great idea if you made this change”. There’s no guarantee that it’ll be accepted (there may be a good reason that I’m unaware of why that resource isn’t listed at https://openstreetmap.community/). If/when it does get accepted it’ll look something like this.

Setting up ssh access to github

As an aside, because this is the first time that I’ve needed to use this machine for anything ssh-related, I’ll create ssh keys and upload to github.

cd ~/
ls .ssh
ls: cannot access '.ssh': No such file or directory

To create a key pair:

ssh-keygen -t ed25519 -C "anemailaddress@example.com"

You’ll be asked for a passphrase - enter one and verify it. A file, in my case called “~/.ssh/id_ed25519.pub” will be created that begins “ssh-ed25519”.

In Github:

Settings
ssh and gpg keys
New SSH Key

Add ssh key
(confirm password)
(receive email about new ssh key)

When you get to the “git commit” part, if this is the first time that you’ve done that on this machine, you may be asked to “Please tell me who you are” and suggested to run:

git config --global user.email "you@example.com"
git config --global user.name "Your Name"
Location: 21.871, 33.737
Running Potlatch 3 on Linux

Posted by SomeoneElse on 28 January 2021 in English. Last updated on 1 February 2021.

As you will no doubt have heard, browser support for flash went away at the end of last year. As you can read here, Potlatch 3 has been released and downloads for Windows and Mac are available. Linux users are asked to “Use Wine to run the Windows installer”. You may be wondering “why?” - there’s a section at the end of this diary entry that covers that. First, the “how”:

What do I need to do?

There are lots of different Linux distributions out there. Most have some sort of package manager and in most of those “wine” will be available as a package. Here is what I needed to do on a couple of desktop Ubuntu systems (both using KDE) - one running 18.04 LTS, the other 20.04 LTS.

Firstly, install Wine itself:

sudo apt install wine64

Next, you’ll probably need to install some fonts that software that normally runs on Windows needs. You can do this via a helpful script Winetricks. First, install cabextract, which is needed by the script:

sudo apt install cabextract

Next, decide where to install the “winetricks” script. I’ll put it in an existing user “bin” directory, so:

cd ~/bin
wget https://raw.githubusercontent.com/Winetricks/winetricks/master/src/winetricks
chmod +x winetricks

Next, install the fonts:

winetricks corefonts

Finally download Potlatch 3 (choose the “Windows application” option, which is a zip file) from the download page, unzip it, and run it:

wine64 Potlatch.exe

Follow the instructions that are presented and accept the defaults to “just install” it.

Running Potlatch 3

When Potlatch runs, you’ll initially see the whole world zoomed out. Rather than zooming in manually you can then “edit with remote control” from the openstreetmap.org site to go to wherever you are currently looking at there, and you can also search for any sort of OpenStreetMap URL to jump straight to it. “GPS / My tracks / load” loads GPS traces.

A resulting changeset can be seen here. Somewhat confusingly, it says the OS was “Windows 7” because that’s what Potlatch thought that it was running on!

What might I still need to be careful about?

As well as clicking “save” at the top left (or pressing “s”), also don’t forget to close changesets by pressing “c” when needed.

If you try and do too much too quickly it can fall over. To reduce the chance of this happening:

  • Wait for imagery to load before moving the map again
  • Press “save” before moving the map. If something does fail, at least you won’t have lost any edits.
  • If you know you want to move the map to somewhere else manually (scrolling, rather than using search), set the background to “none” first.

Why not just run a Potlatch 3 AIR file on Linux?

This is available from the download page, but there are some problems. These include:

  • The AIR downloads have disappeared from Adobe’s site. Harman is now looking after it, but it’s not immediately clear where you’d start from there.
  • The Linux runtime is very, very old and doesn’t support the latest transport layer security versions, resulting in SSL issues.
  • The old Linux versions are 32-bit, meaning that there are hoops to jump through to get the necessary libraries in place on a modern 64-bit Linux system.

None of these issues occur with Wine:

  • A recent version of AIR can be distributed within the Windows executable
  • It supports TLS 1.2
  • 64 vs 32 bit issues are handled automatically by “Windows Side by Side” (WinSxS). Neither you nor Potlatch need to worry about it.

What else might go wrong?

I’ve found one machine, an old Chromebook running Ubuntu 18.04 LTS via Crouton that “just sat there” when trying to run the P3 self-extracting .exe for the first time. It may just be that it needs more memory to run the installer (it has 2Gb; the 20.04 machine mentioned above has 4Gb). Using the .zip download fixed that issue (hence that recommendation above). Other relatively low-spec machines are also fine; the Ubuntu 20.04 machine was a fairly average spec when I bought it over 10 years ago.

Location: Incline Village, Washoe County, Nevada, 89451, United States

Missing National Parks

Posted by SomeoneElse on 29 December 2020 in English. Last updated on 30 December 2020.

National parks and AONBs in northern England

Occasionally, I (like other people I’m sure) have noticed that things “disappear” from maps they should appear on. In the case of “national parks” and “areas of outstanding natural beauty” in the UK, they’re mapped as multipolygons. This might be simple, like Nidderdale or more complicated, like Ynys Môn. What usually happens is that someone accidentally “breaks” the multipolygon, for example by creating a gap in an outer edge, so that rendering software sees it as invalid and ignores it.

What I’ve typically done in the past is, whenever I’ve noticed a problem tried to find the problem using something like the OSM Relation Analyzer or JOSM’s validator. The “area” view at Geofabrik’s OSM Inspector is also useful.

That works, but “happening to notice a problem” as a first step is not ideal. This map does show national parks / AONBs and not a lot else at zoom 7, but those tiles only typically get updated every 4 days, so it can lag behind problems.

How to find out which ones are missing?

I have a rendering database that covers GB and Ireland, and in there “SELECT distinct name FROM planet_osm_polygon WHERE (boundary = ‘national_park’);” will list all those items that are currently being rendered. As an aside, that query is on “boundary=national_park” because the data is processed by this lua style file as it is loaded, and that consolidates the tagging into something that makes the rendering code less complicated.

Next, the challenge is to get the same list from OSM. Thanks to this answer on the help site, I was able to do that. There’s a bit of manual work comparing the two, because:

  • My database has some “overseas” national parks in it in error, where the “only update the rendering database with local data” test hasn’t worked.
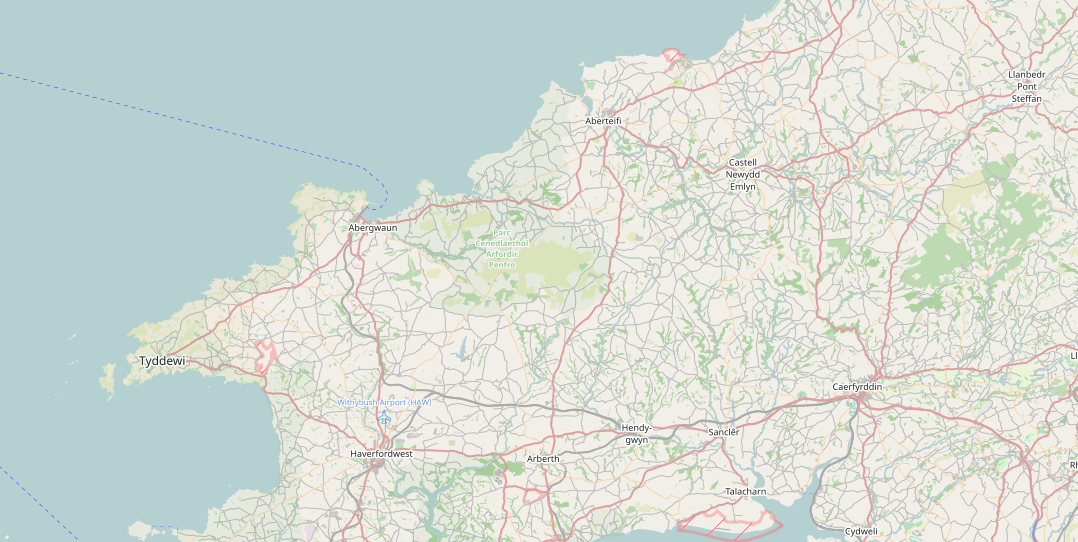
  • My database has some different names in some cases - I set the name field for the Pembrokeshire Coast National Park to name:cy (“Parc Cenedlaethol Arfordir Penfro”) rather than name (“Parc Cenedlaethol Arfordir Penfro / Pembrokeshire Coast National Park”) based on its location in Wales.
  • There’s at least one “extra” AONB in OSM (Dunstable Downs, which is actually part of Chiltern Hills AONB).

Once I’ve done that, I have two lists that I can compare.

Which ones were missing

Chiltern Hills AONB
Dorset AONB
High Weald AONB
Kent Downs AONB
Llŷn AHNE
Shropshire Hills AONB
South Devon AONB
Sperrins AONB
Suffolk Coast & Heaths AONB
Ynys Mon AHNE

Fixing the missing ones

The process is the same manual process as before - download the relation as an object in JOSM, validate, and look for errors in the multipolygon. In some cases (for example “unconnected coastline”) you might need to load a bit more data to avoid seeing unrelated errors. Generally speaking you can ignore the warnings, as most of these are unrelated to multipolygon validity and some are completely invalid.

Usually what’s happened is that someone’s redrawn some feature that formed part of an AONB boundary and neglected to add the new part back into the AONB relation. To take Dorset AONB as an example, it looks like previously one of the railway lines formed the boundary, but that had been edited to leave a gap, so I redrew that as a new way slightly to the south in these changesets.

Shropshire Hills AONB was the most difficult to diagnose and fix. JOSM didn’t actually find an error there so I had to go through the warnings. It may have been this change that finally fixed it (zoom in on the green line east of Craven Arms to see the red line and deleted nodes).

Detecting future problems

Next - what’s the easiest way to detect breakages as they occur? I don’t want to have to manually compare with Overpass every time, but the good news is that I don’t have to - I can just compare with the list that was in the database yesterday, and look for things disappearing from the list.

# ------------------------------------------------------------------------------
# Count national parks, and see if there are more or fewer that when we last
# looked.
# ------------------------------------------------------------------------------
mv /home/renderaccount/data/nationalparks.justnow /home/renderaccount/data/nationalparks.previously
psql -d gis -c "SELECT distinct name FROM planet_osm_polygon WHERE (boundary = 'national_park');" > /home/renderaccount/data/nationalparks.justnow
diff /home/renderaccount/data/nationalparks.justnow /home/renderaccount/data/nationalparks.previously
#

That now runs as a cron job on map.atownsend.org.uk every morning, and if there are any changes, I’ll get emailed the results.

Location: Craswall, Herefordshire, England, United Kingdom

Screenshot of switch2osm page

I’ve added a new page to the switch2osm guide: “Updating your database as people edit OpenStreetMap”.

It’s a bit overdue (it’s based on something I wrote about 4 years ago, and the software it uses predates that by a long way), but I think it is worth making available on the main site.

I’ve tested it both on Debian 11 and on Ubuntu 20.04 LTS, and have tried to make clear what you need to do differently in each case.

For completeness see also Ircama’s excellent guide which is well worth reading as it actually provides a lot more detail about the process, and also suggests how “osmium” may be used instead of “osmosis” to process OSM files.

Location: Anabu II-F, Imus, Cavite, Calabarzon, 4103, Philippines

Screenshot of switch2osm page

I’ve added a new page to the switch2osm guide: “Manually building a tile server (Debian 11)”. The Debian developers have worked to include the required software inside Debian 11, so there’s actually less setup work needed than in previous versions.

Debian 11 has not yet been released; it’s still “testing”, so there may be minor changes along the path to release. Also, there’s currently a temporary problem with the Natural Earth download site that requires a workaround, but that’s documented in the guide. When that is resolved I’ll update the notes.

I’ve not yet linked the new page into the menus because I want to give people a chance to test it and identify any problems first. Once that’s happened, I’ll add it to the “Serving Tiles” menu.

Location: Kolonia Łabędnik Mały, gmina Bartoszyce, Bartoszyce County, Warmian-Masurian Voivodeship, Poland

Pubs "closed due to Covid"

Posted by SomeoneElse on 15 August 2020 in English.

Unfortunately, in England at the moment a number of pubs aren’t able to reopen because (especially locally to me) they’re too small and have lots of small rooms or they’re music venues for which “social distancing” somewhat defeats the object of the event in the first place.

I’ve chosen to show these on this map like this:

Fulford Arms

This is deliberately different from the rendering of “normal” closed pubs:

Blacksmiths Arms

the idea being that hopefully the “closed due to covid” ones will be able to find a way of working sooner rather than later.

I’ve done this by looking at the “opening_hours:covid19” tag - that seems to be the most used for this both globally and locally. To be able to handle these as a new object, they’re split out in the lua code used by the style and then added to the mss file that actually does the rendering.

Location: Rosedale West Side, North Yorkshire, England, United Kingdom

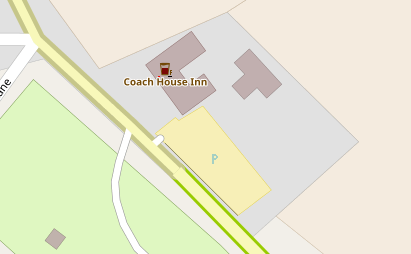
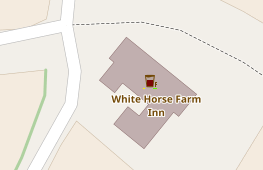
I’ve recently added a new feature to https://map.atownsend.org.uk , prompted by the dreaded lurgi that is affecting everyone at the moment - the ability to show pubs with either outdoor seating or a beer garden.

Outside seating is shown like this:

Coach House Inn

with a black line at the bottom right of the icon.

Here’s a beer garden:

White Horse Farm Inn

with a green underline instead of black

For the rest of the map legend see here.

Location: Rosedale West Side, North Yorkshire, England, United Kingdom

I’ve added a couple of short but interesting scripts to github. They fetch and sort posts from an OSM mailing list from some time in the past. For example, here are the topics on the talk list at the height of the licence change furore:

listtopics.sh talk 2012 May

 35  OSM : It's a shame !!!
 24  Edit review: ele=0
 22  Worst of OSM
 21  TomTom is thumping us
 17  Import of buildings in Chicago
 17  Edit review: intermittent waters
 16  OSM cycle map - ?excessive focus on long-distance routes
 15  Edit review: "building"="levels=N"
 14  Cycleways and Access tags: Left, Right, Forward, Backward?
 10  OpenSeaMap
 10  Cycle lanes & cycle tracks - my findings and a proposal
  7  Changing capitalization (Lima)
  6  OWL down
  6  OSM data density - top regions
  6  Old versions of OSM?
  6  Copy-and-paste remapping
  5  TTTracklog and TomTom core 9.4
  4  OSMCoastline / OpenStreetMapData.com
  4  Mapnik rendering issue with *_link roads
  4  (dis)Honesty and Copyright

and here’s the tagging list today:

listtopics.sh tagging 2020 May

106  Reviving the path discussion - the increasing importance of trails in OSM
 75  Tag:amenity=motorcycle_taxi not approved
 58  Remove non-prefixed versions of 'contact:' scheme
 49  RFC ele:regional
 42  relations & paths
 35  Doorzone bicycle lanes
 34  Permanent ID/URI --- off topic email
 30  Feature Proposal - RFC - Recreational route relation roles
 26  Change of wiki page Key:access
 25  Adding values healthcare=dispensary and healthcare=community_care?
 24  track vs footway, cycleway, bridleway or path
 23  Is there any tagging scheme for carillons already?
 15  Meaning of "administrative" in boundary=administrative, in your country?
 14  With leisure=common deprecated, Senegal & Mali need a replacement
 14  [OSM-talk] Should we map things that do not exist?
 14  oneway=yes on motorways
 11  Section numbers in hiking routes
 11  Running but no hiking/walking
  9  Quality and the Openstreetmap value chain
  8  Fwd: Section numbers in hiking routes

looking at the names, some of these from 2007 are still familiar:

listpeople.sh talk 2007 May

 79 Frederik Ramm
 59 David Earl
 46 Nick Whitelegg
 33 Richard Fairhurst
 31 Christoph Eckert
 27 Jon Burgess
 26 Andy Robinson
 25 Martijn van Oosterhout
 21 Lester Caine
 18 SteveC
 18 Robert (Jamie) Munro
 17 Nick Black
 16 Joerg Ostertag (OSM Munich/Germany)
 15 Steve Chilton
 14 Francisco R. Santos
 14 David Groom
 14 Barnett, Phillip
 13 Hakan Tandogan
 12 Robert T Wyatt
 12 Matthias Julius

I’ve added a new page to the switch2osm guide: “Manually building a tile server (20.04 LTS)”. At the same time, the old “with packages” instructions has been retired from the list as that depended on Ubuntu 14.04, which has now dropped into Extended Maintenance.

Ubuntu 20.04 (“Focal Fossa”) has now been released. There are actually very few changes from the 18.04 version - mostly just updated versions of software (including postgres 12). Following these instructions shouldn’t take more than a couple of hours for small areas - the longest period of the setup is waiting for the shapefiles used by the style to download.

As before, the page is designed to be “the least you need to do” to get a rendering server working to create tiles like the ones that you see at openstreetmap.org. If it still sounds a bit complicated, don’t forget that you can try things out with Docker very quickly - and that should work anywhere that Docker is supported.

For some time I’ve been experimenting with how other information can be added to established icons. For example, here’s how I’ve been representing various tourist information items:

tourist=information icons

In those examples there are only two pieces of information - that it’s something to do with tourist information, and whether it’s a board, guidepost, plaque, etc.

With pubs, I already show several sorts of information together. For example this one:

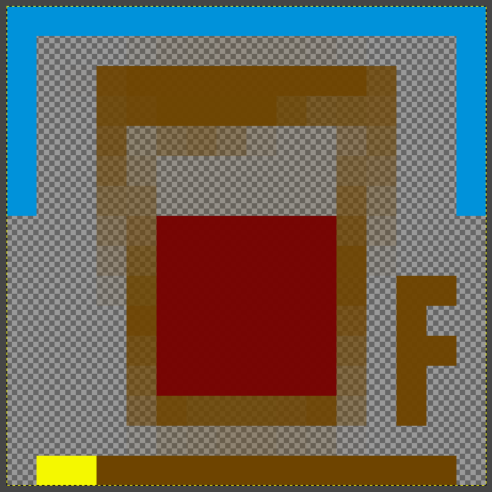
pub icon filled with nice beer, underlined, and with "u" and "F"

is a pub that’s open (it’d have a cross in the middle of the beer glass if it wasn’t), serves real ale (you can tell from the maroon liquid in the glass), is a micropub (the μ at the left shows that), serves food (the F at the right) and has a noncarpeted floor that means if you’re wearing muddy boots you don’t need to take them off before going to the bar (the brown underline).

A couple of other modifiers are also available - here’s a map showing a pub with a blue “roof” that offers accommodation as well as food:

Map snippet showing pub icon with blue roof for accommodation

I thought that it was possible to also show the values from a “wheelchair” tag, so I added that at the left-hand side of the “floor” bar:

pub icon with the first two pixels of the "floor" underline coloured yellow

Here yellow is used for “wheelchair=limited”, green means “wheelchair=yes” and red for “wheelchair=no”. If there is no wheelchair tag the original icon is used.

Obviously, specialist maps such as wheelmap already exist for this sort of thing, and they can provide much more information (e.g. nearest wheelchair accessible toilets), but there’s no reason why a more general map style can’t show this sort of thing too.

Here’s an example of what the resulting map looks like. The extra colour is deliberately not intrusive but is designed to be visible if you’re looking for it.

As you may be aware, the “switch2osm” site recently moved from Wordpress to Github. This means that it’s easy to request changes to the site over at the github repository. Any changes made there will automatically go live on the main site after a minute or so.

“Requesting changes” might mean commenting on existing issues or creating new ones (which will need someone else to make the code or text changes you’ve requested), or it might mean suggesting the changes yourself via a “pull request” - a list of specific changes you’d like to see made. Here is an example of a pull request - you can see what it’s a change from and to, and on this page you can see any comments and when it was merged in and by whom.

Obviously, if people can contribute via pull requests rather than just creating issues it’s better for everyone - it means that you’re not relying on someone else reinterpreting the changes that you’d like making, and it’s quicker for the maintainers too.

Normally if you wanted to make a major change to something on this site you’d “fork” a copy of the repository into your own github area, create a “branch” from that that relates to the change that you’d like to make, “clone” that locally into an environment on a local machine that allows you to test the site locally, make your changes, test your changes in a local web browser, submit your changes back to your copy of the site, and then create a pull request explaining the change you’d like to make.

What you may not know is that for simple textual changes you can actually do the whole process online. That’s not appropriate for anything that might break links, but for simple text changes (like the example above) it’ll work just fine, and this is what the rest of the diary entry describes.

If you don’t have a github account already, go to https://github.com/switch2osm/switch2osm.github.io. If you don’t have a github account click “sign up” at the top; if you do have a github account already, continue from “Next, at the top right” below.

Select a plan - for the purposes of this exercise “individuals” and “choose free” will work just fine. Then “complete this step”.

That takes you back to https://github.com/switch2osm/switch2osm.github.io.

At the top of the screen there’s a big green button labelled “read the guide”. That’s a useful introduction - you can either read it now or click on the link later.

While that was happening, you’ll have been sent a “Please verify your email address” email from Github. Click through the link from there to prove that you are who you say you are.

Next, at the top right of the https://github.com/switch2osm/switch2osm.github.io page (just below “read the guide”) there’s a button labelled “Fork”. The tooltip says “Fork your own copy of switch2osm/switch2osm .github.io to your own account”. Click that.

Wait a few seconds. When the repository appears you’ll get a prompt to “set up github actions” - you can dismiss that for now.

You’ve now got your own copy of the “switch2osm” github repository. Next, you’ll want to create a branch to hold your changes. In this example I want to make a small textual change to how “renderd” is described on one of the “manually building a tile server” pages, so I’ll call it “renderd_text_change”. From your copy of the repository (something like “https://github.com/yourgithubusername/switch2osm.github.io”), To create a branch, click on where it says “Branch master”, type in the new name and click “create”.

Now browse to the page that you’d like to change. In my example it’s “https://github.com/mygithubusername/switch2osm.github.io/blob/renderd_text_change/serving-tiles/manually-building-a-tile-server-18-04-lts.md”. It’s just a text file in Markdown format. At the top right-hand corner there’s an edit button. Click that, and make the necessary changes.

When you’re happy that your change is complete, at the bottom of the screen type in a short one-line summary of your change followed by a longer description. Ensure that “Commit directly to the branch" is displayed (not "master"). Click "commit changes".

Go back to “https://github.com/yourgithubusername/switch2osm.github.io”. You’ll now see that the screen now shows “Your recently pushed branches:” and gives you the opportunity to “Compare & Pull Request”. Click that. Review your change (old version on the left, new version on the right), and change your summary and description if you want. When you are happy, click “Create pull request”.

Github will then take you out of your copy of the repository into the new pull request in the repository that you forked your copy from. In this example, that’s here. If you scroll down the page a bit you’ll see that initially some background checks are taking place, and then eventually “All checks have passed” and “This branch has no conflicts with the base branch”. You, and other people, can comment on your proposed change. Someone will review it and (probably) merge it without comment. It’ll then be live for all to see at https://switch2osm.org/.

OsmAnd - a worked example of a simple rendering style change

Posted by SomeoneElse on 6 December 2019 in English. Last updated on 14 August 2022.

Imagine I’ve just installed OsmAnd on an Android phone and want to change the rendering slightly.

For completeness, the OsmAnd version is 3.5.5, I downloaded it from Google Play, where it’s called “OsmAnd - Offline Travel Maps & Navigation”. The Android phone is a Blackberry DTEK50 (actually a badged Alcatel design) running Android 6.

I ran OsmAnd and skipped the initial download (because I’ve already got some .obf files to install), but you’ll probably want to download some local data.

I want to copy files to and from the device, so I’ll plug it into a PC. How you copy files depends on the OS on your PC. Next, plug the device in via USB and select “copy files via MTP” from the prompt that appears on the device (this actually varies by Android version, and what options are available to copy files to and from a device depend on that and the phone itself). A window showing an MTP connection to the device contents will probably appear - check you see something in there. If you don’t, unplug it and plug it in again.

I’m running Ubuntu Linux on the PC and want to copy files to and fro from the command line, so I’ll install something to allow me to do that, check that I can read something from the device, and unmount it again:

cd
mkdir mtp
sudo apt install jmtpfs
jmtpfs ./mtp
ls ./mtp
fusermount -u ./mtp

For me the “ls” above shows ‘Internal storage’. Before copying anything used by OsmAnd in the steps below I’ll make sure that it isn’t running on the phone. How to do this varies by phone - on mine it’s “menu” and then “close”.

Next, we’ll look at what maps are currently installed. How to do this varies by Android version, but this is how things appear on this Android 6 device:

ls -alt ./mtp/Internal\ storage/Android/data/net.osmand/files/

total 0
-rw-r--r--  1 ajtown ajtown 1585986668 Dec  6 19:47 Gb_england_europe.obf
drwxr-xr-x 11 ajtown ajtown          0 Dec  3 00:10 .
drwxr-xr-x  2 ajtown ajtown          0 Dec  3 00:10 backup
-rw-r--r--  1 ajtown ajtown        359 Dec  3 00:10 favourites.gpx
-rw-r--r--  1 ajtown ajtown        269 Dec  3 00:10 ind.cache
-rw-r--r--  1 ajtown ajtown    4413090 Dec  3 00:10 regions.ocbf
drwxr-xr-x  2 ajtown ajtown          0 Dec  3 00:10 roads
-rw-r--r--  1 ajtown ajtown   39985159 Dec  3 00:10 World_basemap_mini.obf
drwxr-xr-x  2 ajtown ajtown          0 Dec  3 00:10 fonts
drwxr-xr-x  2 ajtown ajtown          0 Dec  3 00:10 sounds
drwxr-xr-x  3 ajtown ajtown          0 Dec  3 00:10 tiles
drwxr-xr-x 13 ajtown ajtown          0 Dec  3 00:10 voice
drwxr-xr-x  4 ajtown ajtown          0 Dec  3 00:10 ..
-rw-r--r--  1 ajtown ajtown          0 Dec  3 00:10 .nomedia
drwxr-xr-x  2 ajtown ajtown          0 Dec  3 00:10 rendering
drwxr-xr-x  2 ajtown ajtown          0 Dec  3 00:10 routing
drwxr-xr-x  2 ajtown ajtown          0 Dec  3 00:10 tracks

Here’s the directory with the .xml file used for deciding how things in a “.obf” file appear on screen:

ls -alt ./mtp/Internal\ storage/Android/data/net.osmand/files/rendering

total 0
drwxr-xr-x 11 ajtown ajtown      0 Dec  3 00:10 ..
-rw-r--r--  1 ajtown ajtown 691532 Dec  3 00:10 default.render.xml
drwxr-xr-x  2 ajtown ajtown      0 Dec  3 00:10 .

We’ll take a copy of that locally to edit it, and then unmount it:

cp ./mtp/Internal\ storage/Android/data/net.osmand/files/rendering/default.render.xml .
fusermount -u ./mtp

At this point, it’s probably worth a look at the initial version of the default.render.xml file. It actually contains information about how something might appear depending on how a number of different flags are set (in that file you can see things like “nightMode”, “moreDetailed” and “baseAppMode” flags). To see an example of that look at this code - you can see how a bridleway might be rendered from zoom levels depending on various flags, all inside a top-level

<case minzoom="12" tag="highway" value="bridleway">

test. The last line of that section

<apply color_5="$bridlewayColor" pathEffect_5="4_2"/>

sets the colour to one defined above.

One of the simplest changes that it’s possible to make is simply changing the rendering colours.

Let’s make a simple series of changes from e.g.

    <renderingAttribute name="heathColor">
            <case attrColorValue="#d7ebba"/>
    </renderingAttribute>

to

    <renderingAttribute name="heathColor">
            <case attrColorValue="#E6E8C5"/>
    </renderingAttribute>

(and a number of similar ones to match the less “in your face” colours here.

The resulting XML file looks like this.

Stop OsmAnd on the device, copy the new file to the phone, and unmount it:

jmtpfs ./mtp
cp ~/src/osmand_files/default.render.xml ./mtp/Internal\ storage/Android/data/net.osmand/files/rendering/default.render.xml 
fusermount -u ./mtp

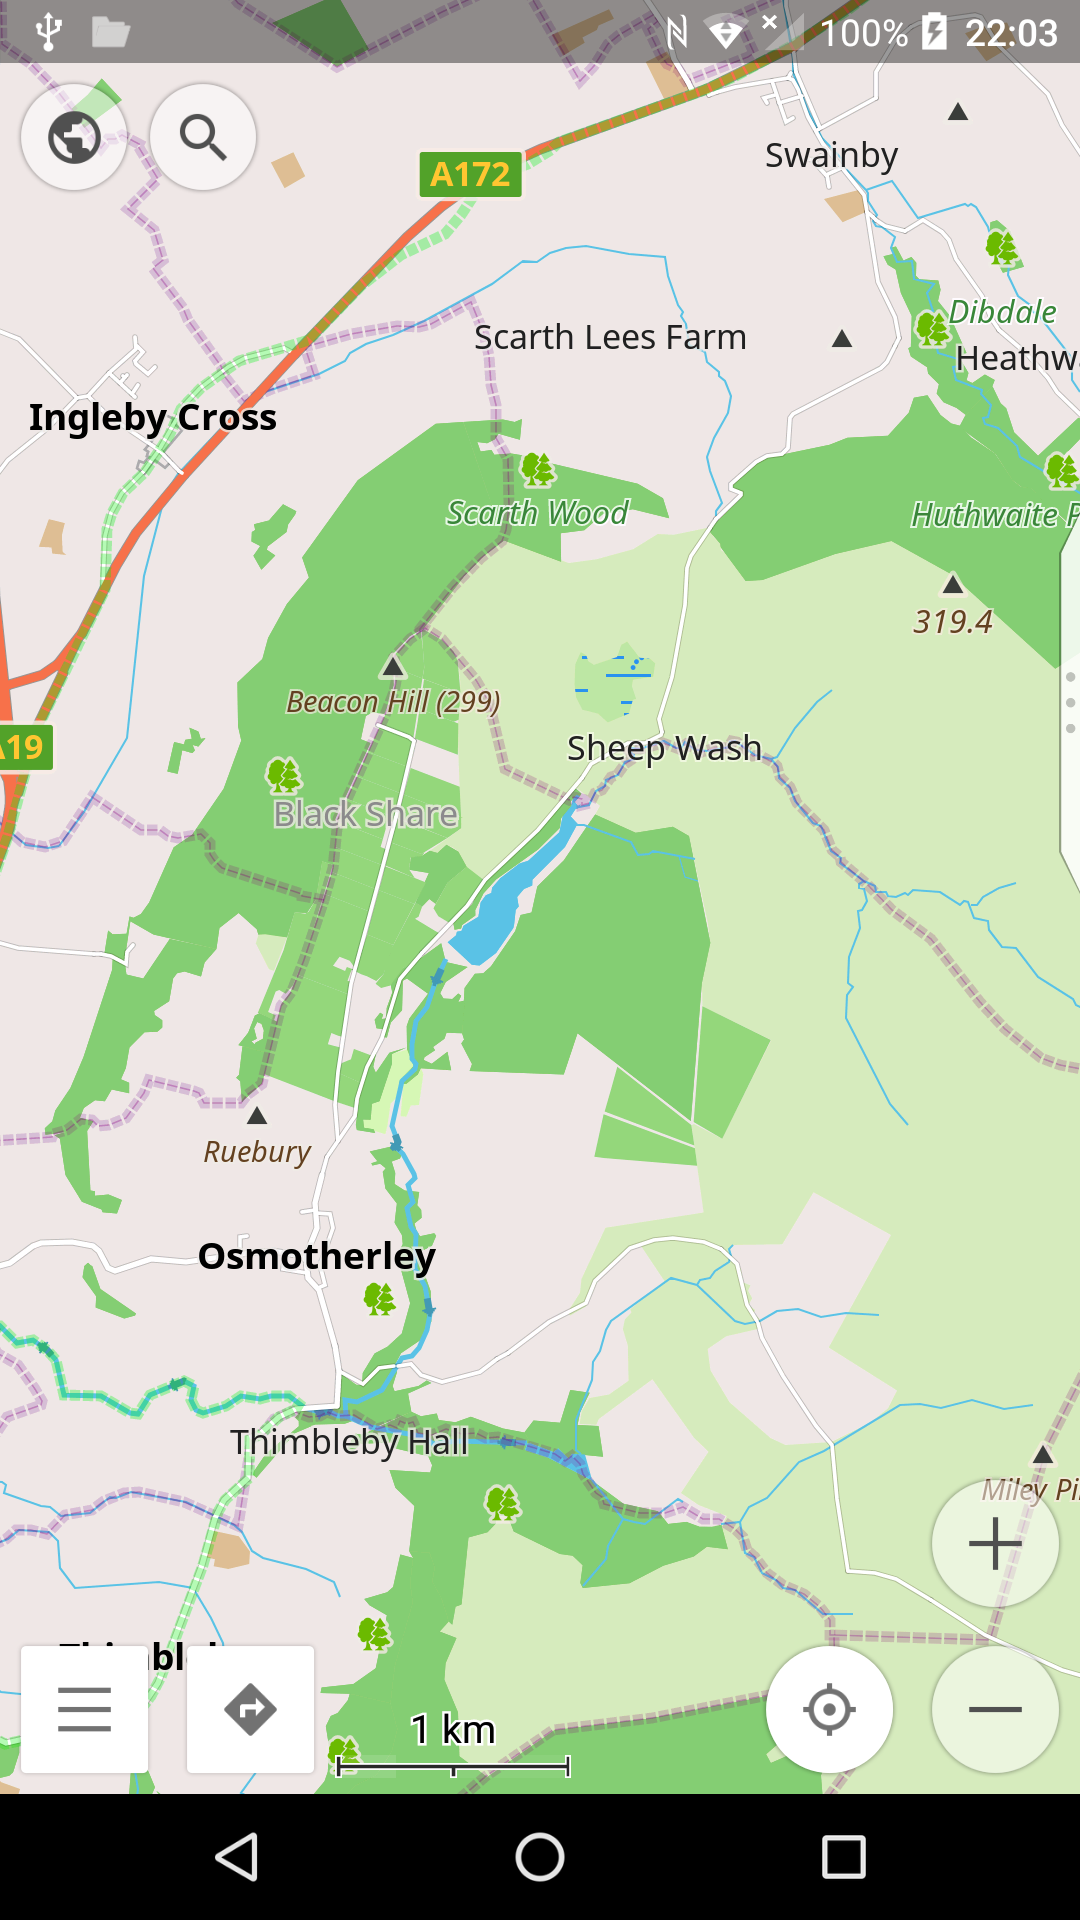
Here’s what it looked like before, and after: before after

Location: Osmotherley, North Yorkshire, England, United Kingdom

Tag Transformations in OpenStreetMap

Posted by SomeoneElse on 5 December 2019 in English.

Welsh place names in Wales

Following recent discussions on OSM mailing lists about tag homogenisation it struck me that there probably wasn’t a good summary anywhere of the tools that people use to change the tags in OSM data into something that they can use. You might wonder why on earth we need to do this, given that OSM has natural language names for everything, but unfortunately many words used in OSM might have different meanings around the world, such as “city” and “highway”. However, this isn’t a diary entry about that - it’s a brief summary of what I’m aware of and have used for converting the “super detailed” tagging in OSM into something more appropriate for e.g. something rendering OSM data.

osmosis

The documentation for this is here. I wrote a diary entry about how I use this method to change the “name” language of Welsh-speaking places in Wales to Welsh, and Scots Gaelic-speaking places in Scotland to Scots Gaelic.

It’s pretty simple to use but it’s a once-off conversion designed for when you might use osmosis at data load - it’s not especially useful within some other process.

The main alternative for “things that you used to do with osmosis” these days is osmium, which is available both as a library and as a standalone tool. I’m not aware that it supports tag transformation directly, but it wouldn’t surprise me if it did (it can do almost anything else).

osm2pgsql’s lua interface

This is documented here. Out of the box, osm2pgsql contains a “filter_tags_generic” function that does a bit of filtering but doesn’t actually change any tag synonyms.

For a simple “change tag X to Y” example, have a look here in the lua tag transform definition that I use for the map at the top of this page. There you can see various “not very much used” tags (and in some cases “really shouldn’t be used”, such as “highway=unsurfaced”) changed to a “lowest common denominator guess”.

Elsewhere in that file you’ll see some tag values that you won’t see in OSM at all. These get handled in the rendering like this and the benefit is that you get rendering code that’s easier to understand - each “logical thing” has its own rendering code and it isn’t cluttered by lots of further tests either in the .mss or the .mml that has to say all the way through “is it X or Y”.

One of the things that the maps here display is England and Wales’ “public rights of way” (tagged in OSM with a “designation” tag). I use series of tag transformations to display different legal statuses in different colours, and paths without that legal status in grey.

osm2pgsql is typically used when creating a database for rendering or doing geocoding from. Alternatives exist, such as imposm. I’m not aware of alternatives that support tag transformation, but that doesn’t mean that there aren’t any.

mkgmap

mkgmap is typically used by people converting OSM data into something you load onto Garmin devices (eTrex, Nuvi, etc.). If you download an OSM-based map for Garmin from somewhere, the chances are that it was created with mkgmap.

Garmin’s internal format has a series of hex codes for everything, so essentially everything in a Garmin style definition is a series of tag transformations (like this one for “points”).

In that example you’ll sometimes see two different things at the left-hand-side converted to the same Garmin feature (e.g. “amenity=conference_centre” and “amenity=convention_center”) and tests combined with an OSM tag (e.g. “amenity=fuel & shop=convenience”).

I wrote a diary entry a while back explaining how to do very simple changes to a Garmin map style.

osmand

OsmAnd is probably the most powerful, most customisable OSM renderer that almost no-one thinks of.

Out of the box you get the ability to download .obf files from OsmAnd’s servers (up to a limit if you go for the free version) or you can create your own maps using OsmAndMapCreator.

What’s less well known is that it’s fairly simply to change the rendering style to something that you have created (see here) and that that can be done independently of the .obf file loaded. The tricky bit is that OsmAnd’s default style definition is a bit of a monster, as it seems to contain “all the style variants that OsmAnd can display” with lots of if/then/else logic for e.g. “is it currently night” and “are we in a car” etc. You can however add your “extra style rules” to a separate file to keep it simpler.

In addition, you can also perform tag transformations directly in OsmAndMapCreator - see here for the sort of thing that already exists, for example.

I’m currently working on a version of the two OsmAnd rendering files that perform the same “designation” processing that the online maps that I use do, though that’s some way off. It uses the same method as the osm2pgsql style.lua - change the things that I am interested in to a new tag name based on other OSM tags, ensure that gets added to the .obf file, and then render it as required.

others

There are lots of others that I haven’t used - this list post mentions the routing engine Valhalla, and I’m sure there are others.

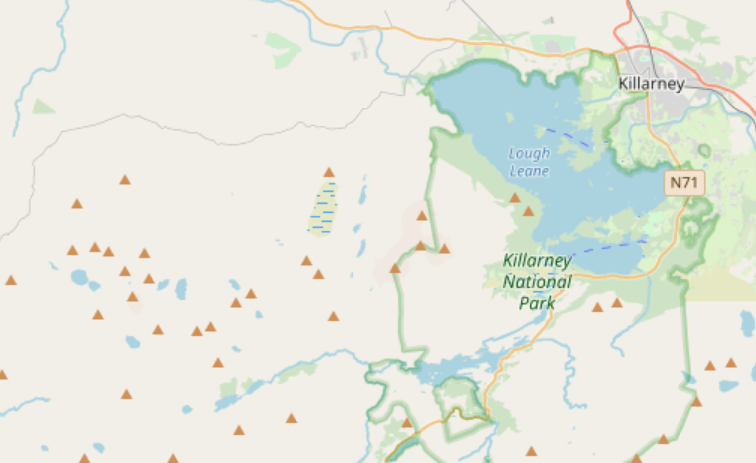
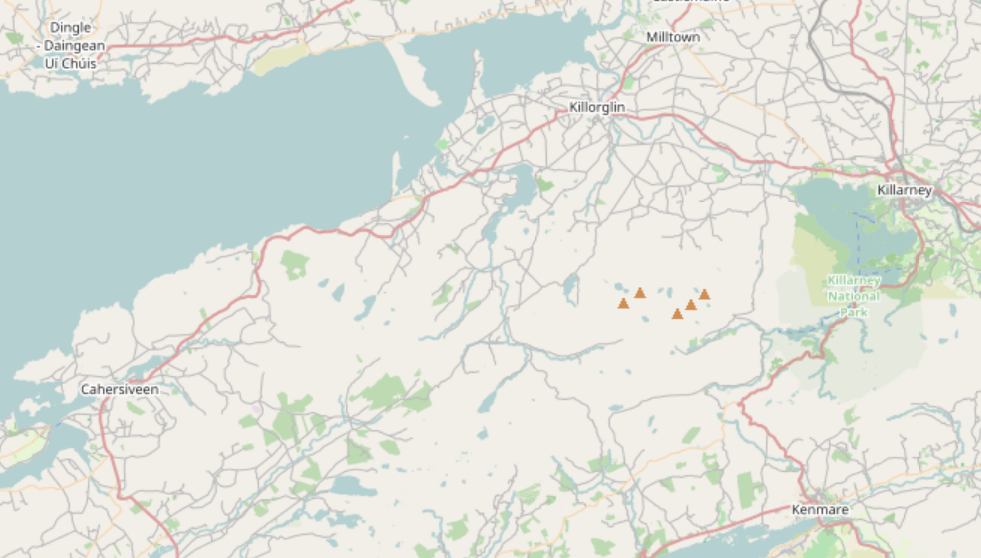
There are a lot of peaks mapped in OpenStreetMap, ranging from proper mountains to mere pimples. They’re usually rendered the same regardless of how high they are:

OSM Carto SW of Killarney

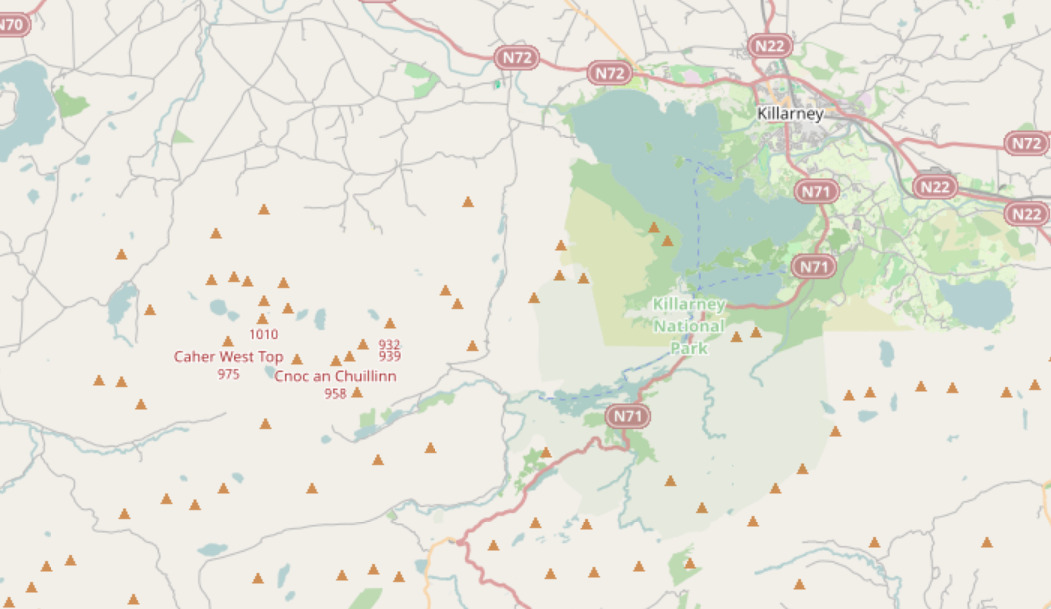
However, with a bit of preprocessing and a bit of help it’s possible to render higher ones at a higher zoom level:

SW of Killarney at z10

and when all are displayed, only display the names of the higher ones:

SW of Killarney at z11

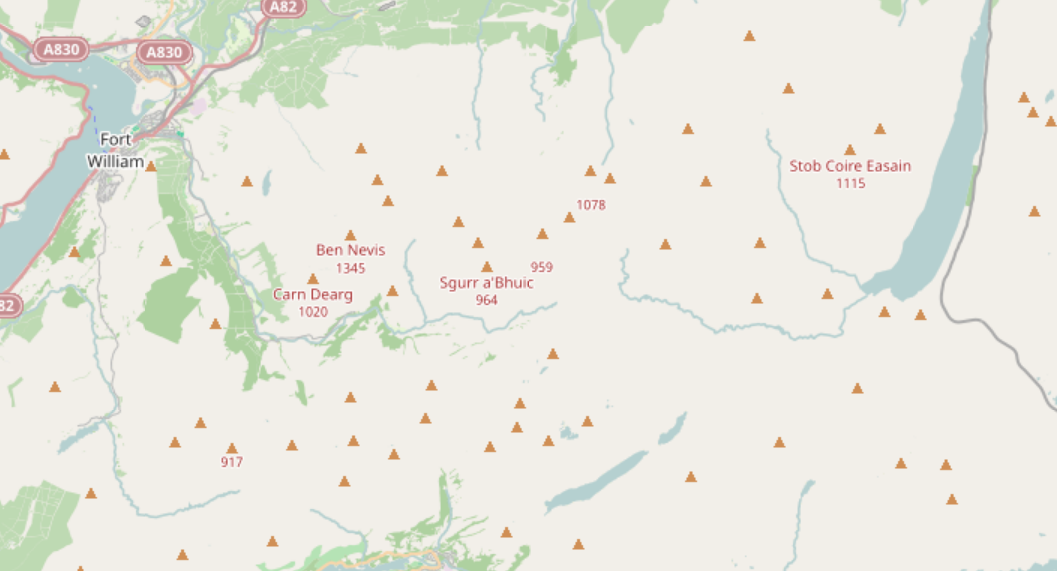
It’s also possible to make use of the topographic prominence if we have that data too (as there is for lots of peaks in Scotland):

E of Fort William at z11

In that example we’re deliberately not emphasising Sgùrr Eilde Mòr, not named in that image, because its prominence is only 271, despite it being over 1000m high, whereas Stob Coire Easain is shown sooner because it has much greater prominence.

Location: Highland, Scotland, United Kingdom

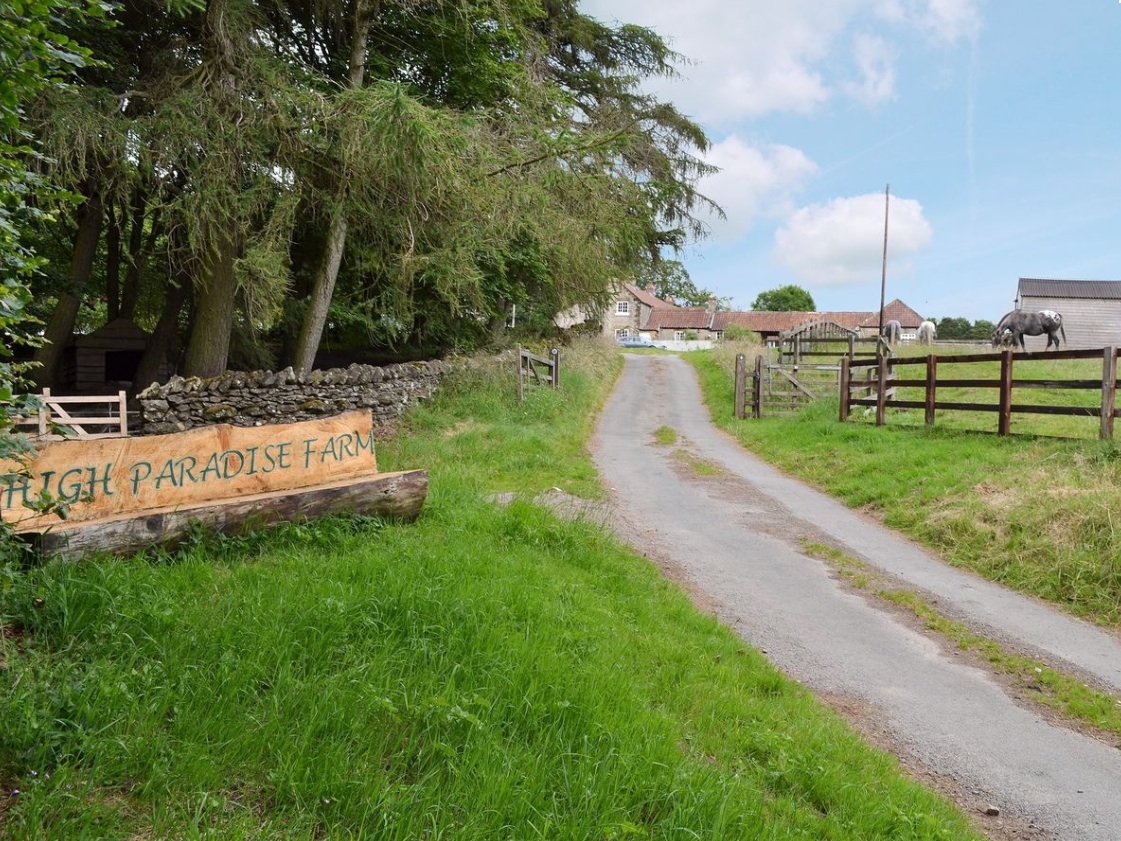
Service road into High Paradise Farm, Yorkshire

I was prompted to write this because of a few discussions over the last couple of months - people talking about the default tags on various OSM elements, reactions to Amazon mappers’ additions of “last mile” service roads and discussions about how to tag England and Wales’ public rights of way network.

This is very much a personal view and one that’s very “England and Wales” centric - there are lots of different approaches to rural tagging in general and footpath tagging in particular, and many places around the world (enlightened places like Scotland and Scandinavia) have different default access rights to the curious set we have ended up with in England and Wales.

Let’s start with an example - what’s the reasoning for the tags on this way in OSM?

Firstly - “highway=service”. That’s simply the physical type of highway that it is most like. Functionally it offers access to the farm and other businesses. Maybe people might argue it should have a driveway tag; maybe someone might think it was a paved track, but service is what it’s been in OSM for 9 years and it’s near enough for me not to change it.

Next, “designation=public_bridleway”. Where does that come from? The answer, I think is roughly here back in 2009. That thread (and parallel ones on talk-gb at the time) discussed how to tag a thing that’s legally one thing, but physically a bit like something else as well, very similar to “my” service road. The source for me to add the tag here was “Public Bridleway” signs along the route.

Next, the basic access tags - “foot=yes”, “horse=yes” and “bicycle=yes”. These say that you’ve got a legal right to walk, cycle or ride a horse up here - they’re also implied by the “Public Bridleway” signs. To an extent it makes sense in OSM not to have duplicate tags for things (it’d be a pretty unusual “highway=motorway” that needed “motor_vehicle=yes”), but it’s not really fair on routers that have to work internationally to expect them to know every nuance of “designation” tagging (which in this case doesn’t even apply to a whole country).

So far, that’s pretty close to the National Trust’s proposed public right of way (PRoW) tagging here. There’s one difference - they’d suggest “=designated” instead of “=yes” on the access tagging, so it’s looking at where that came from. There’s a discussion about the use of those keys in the context of England and Wales PRoWs here.

The reason I’ve not gone with “=designated” on this service road is that it has it’s own meaning documented here - think of a sign people of transport mode X to use a particular route. An example of this is here near Sheffield - there’s a poorly-signed public foootpath across the road there, but signage diverting pedestrians along the road via the roundabout (playing human frogger on a dual carriageway is not a good idea). The usage of “=yes” vs “=designated” on “designation” ways varies around England and Wales. Compare here (roughly the same number of each) with here (hugely in favour of “=designated”).

Other tagging would also make sense, such as a surface tag on the service road (I added one here but forgot further on), but there’s always the option to add more detail later.

Returning to one question from the start of this diary entry - do Amazon mappers’ additions additions of “last mile” service roads cause a problem? Imagine if someone added a track or driveway between two public roads that wasn’t public - wouldn’t it confuse people into thinking that there was a public route between the two when there really wasn’t? I’d argue not really, since without access tags you simply can’t assume (in England and Wales) that you have access along a track or driveway, even on foot. Where people have mapped access properly it’s easy to see where you know you definitely can go and where you’re not sure, and someone can always add access tags later - OSM has always progressed incrementally like that. This is if you’re using a map that shows it, of course but since 2009 I’ve always used e.g. Garmin maps that do.

Best Regards,

Andy

Location: Low Paradise Farm, Boltby, North Yorkshire, England, YO7 2HS, United Kingdom

(following on from this diary entry)

Supposing you would like to overlay a set of boundaries over the top of any existing map style - what would you need to do?

Using this as a reference, create a database to hold the new boundary data.

If a historical data file is what you want, download the data for the desired date and rename it to a file name that the “update_boundaries” script will recognise:

-rw-rw-r--  1 renderaccount renderaccount   459723464 Nov  2 01:46 ukraine_2018-11-01T21:14:02Z.osm.pbf

You can also make other changes to this data if you wish using tools like osmium, osmfilter, osmosis, etc.

Modify this script to process your data.

Run the script to load the data that you have already downloaded:

sudo update_boundaries.sh current

Create a version of “mapnik.xml” (or whatever style file you are using) that looks in the database that you’ve loaded your boundary data into. In this case I just changed “dbname” references from “gis” to “gis3”.

Ensure that “/usr/local/etc/renderd.conf” knows about the new tile layer. The default one I use just has “ajt” in it; I created a copy of the last section, called it “ajt3” and changed URI and XML values.

[ajt3]
URI=/hot3/
TILEDIR=/var/lib/mod_tile
XML=/home/renderaccount/src/openstreetmap-carto/mapnik3.xml
HOST=localhost
TILESIZE=256
MAXZOOM=20

Restart renderd and apache2, and your new tiles will appear. Then in a simple Leaflet map add an overlay layer for your new tiles. This is an example that shows Leaflet overlays but there are many, many others, including on the main Leaflet site itself.

Here’s what it looks like:

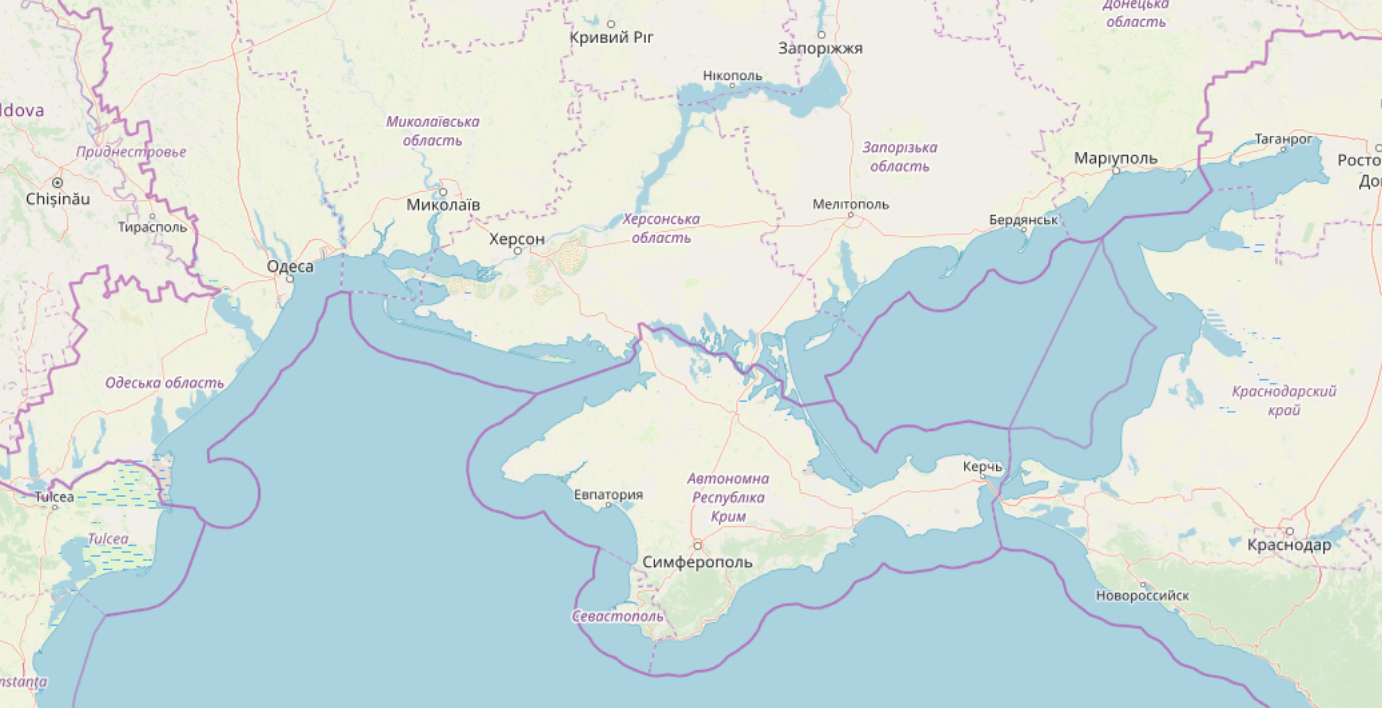
Ukraine borders overlaid over OSM Carto

It’s not perfect - there may be name label collisions between the two layers of data, especially as the labels from OSM Carto haven’t been removed (unlike with this style). It is however a very easy way to see boundaries corresponding to a particular viewpoint over the top of existing map tiles.

If you find downloading a processing OSM data too complicated, then you can just use the tiles I created for this example. An example tile is:

http://map.atownsend.org.uk/hot3/6/38/22.png

and the generic definition for a Leaflet overlay layer is:

 var somenameUrl='//map.atownsend.org.uk/hot3/{z}/{x}/{y}.png';

Note - something like this approach to boundaries is something that’s been written about before. See for example this diary entry by PlaneMad from 2 years ago that replaced one set of boundaries in the data with another. This approach is I hope easier, although it doesn’t change the actual data used to create the main map tiles.

Showing boundaries as a separate layer on https://map.atownsend.org.uk

Posted by SomeoneElse on 24 November 2018 in English. Last updated on 20 September 2021.

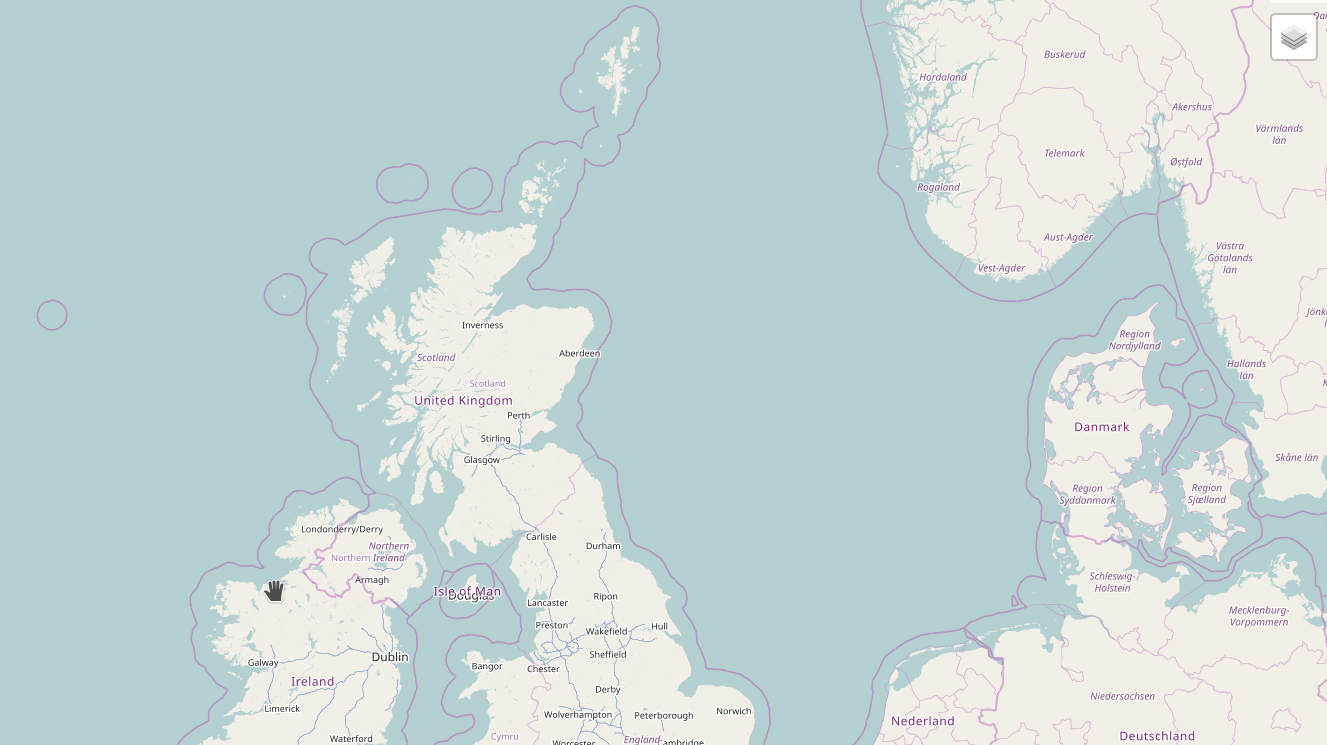
When I developed the map style that you can see here from OSM-carto one thing that I didn’t carry forward was the representation of borders. Partly this was because it’s not easy to separate maritime ones from non-maritime ones, the the purple maritime country borders frankly don’t look very nice:

Purple borders

Partly it was also due to “clutter” - I didn’t want an arbitary boundary to get in the way of a river or stream or other feature.

Sometimes however, it would be useful to see what borders are where, so why not do it as an overlay? This turned out to be rather easier than anticipated.

Firstly, a separate database was created (called “gis2”; by default an OSM Carto-based style will use “gis” as a database). That was set up as per the createdb section of the switch2osm guide. The reason for using a separate database was mainly to allow boundaries to be loaded independently of the rest of the data (and for a larger area if desired), but it would also allow different sets of boundaries to be loaded, if that was needed (some countries have legal requirements about how they are displayed on maps, and these may not match on-the-ground reality or the requirements of neighbouring countries).

The next job was to load some data into it. Normally I’d reload data using this script. For boundaries I created a version of that that used osmium, osmconvert and osmfilter to select only boundaries from the data and remove non-boundary tags that might render too.

After processing, the file with just boundaries in it was around 1/30 the size of the original file, so loading the second database with all of Europe’s boundaries wasn’t a problem.

Next the style needed to be changed so that boundaries were displayed over transparent tiles. This was done by changing water-color and land-color in style.mss to “rgba(0,0,0,0)” in each case.

Finally and most importantly, the style needs to read data from “gis2” rather than “gis”, and that’s defined as the “dbname” in project.mml.

The results can be seen here. Select “Controls” and then “Boundaries” from the layer switcher to turn them on and off.

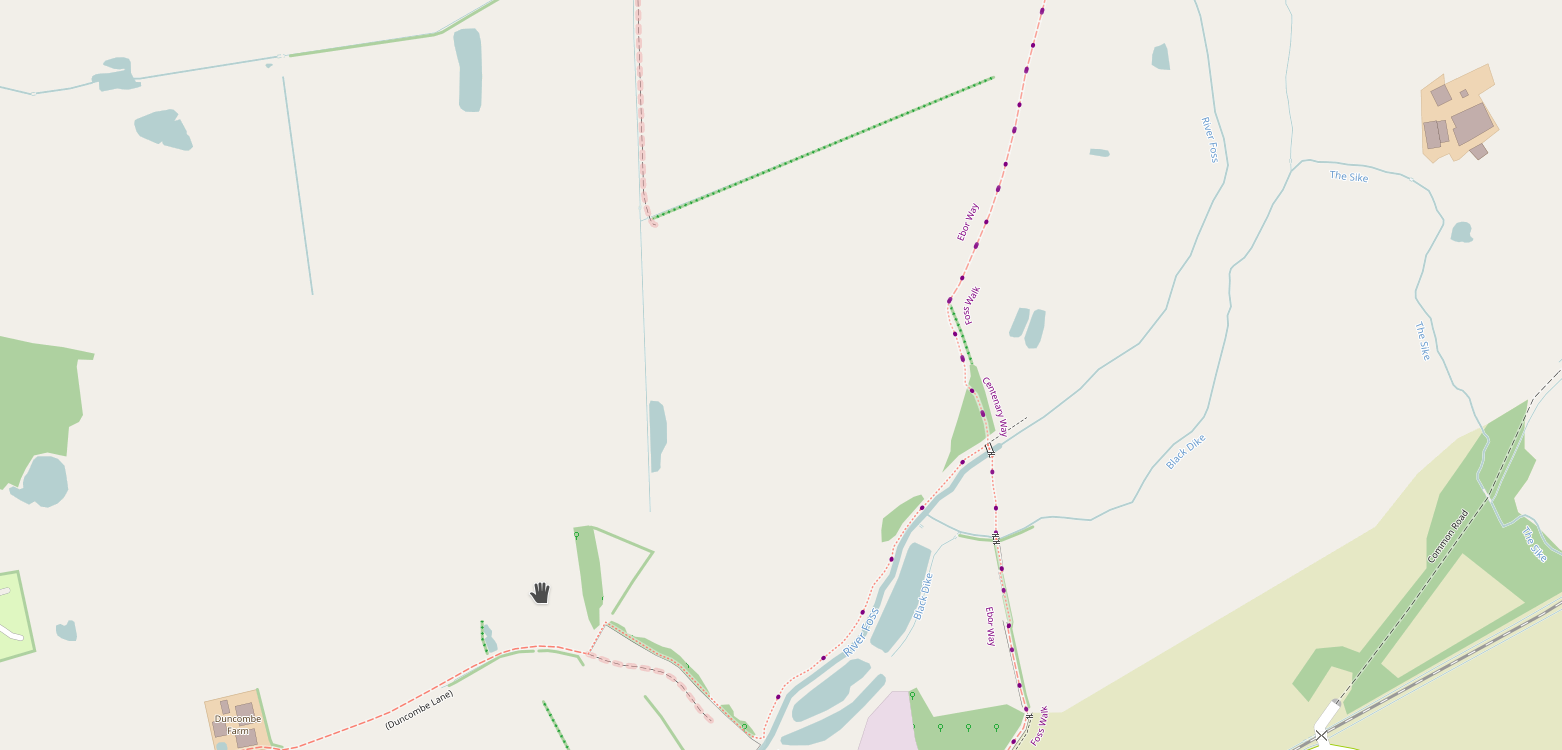
An example of a map without boundaries is:

without boundaries

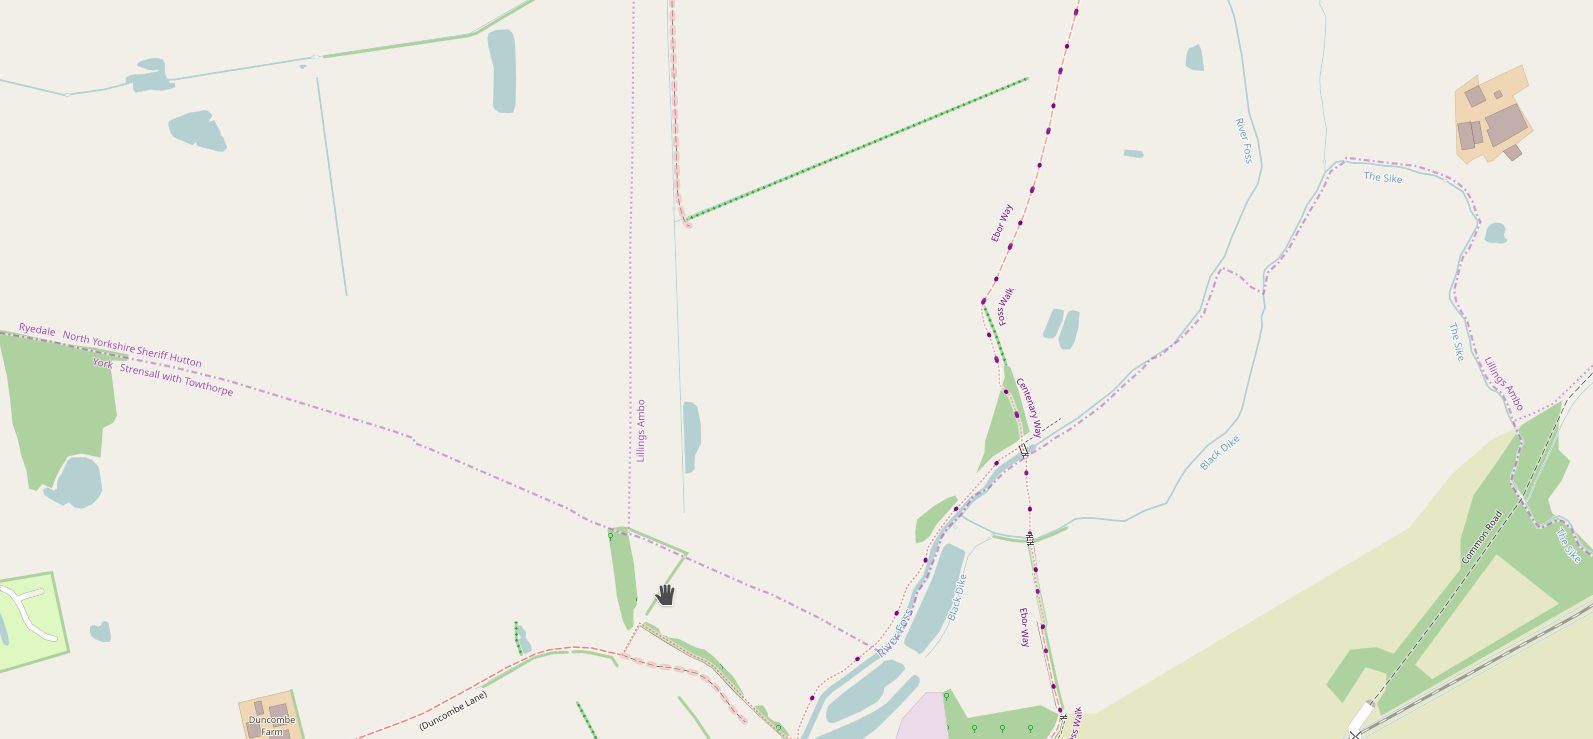
and with is

with boundaries

Surprisingly, even though walking routes and boundaries are both labelled in purple, because boundaries are the only purple linear feature, there isn’t any real confusion between the two.

Location: Lillings Ambo, North Yorkshire, England, United Kingdom

A "switch2osm" guide for Docker on Centos 7

Posted by SomeoneElse on 1 October 2018 in English. Last updated on 14 December 2019.

I’ve been wanting to write an explainer for this for a while (even before this diary comment). The problem was that I wasn’t aware of a Docker example that (a) was reasonably up to date and (b) was designed around tile serving (rather than style design for example).

However, this docker example was recently mentioned by its author on IRC. It’s based on the building a tile server for 18.04 instructions and also handles importing data and running the tile server afterwards.

First things first, I installed Centos 7 on a virtual machine. I got a “minimal” iso image for that from here. I installed it (which involved turning the network on inside the installer and selecting the disk to install on). I also set a root password and added a non-root user (I’ll use the example “renderaccount” below), and noted the IP address that it obtained. I did a “yum update” to install any available software updates.

There are a few sets of instructions for “installing Docker on Centos” - DigitalOcean have one, and there’s one here which also contains lots of other useful information. Following the instructions there:

su -
yum install yum-utils device-mapper-persistent-data lvm2 wget
yum-config-manager --add-repo https://download.docker.com/linux/centos/docker-ce.repo
yum install docker-ce
systemctl start docker

If you then do this:

systemctl status docker

In the output you should see “active (running)”. Do this:

systemctl enable docker

in order to have docker start every time and then exit from root and do this from you’re non-root user:

sudo usermod -aG docker $USER

So that you can control docker from that non-root user. Log out and back in and do this:

docker container run hello-world

It should say “Hello from Docker!” to show that everything is working OK. If instead you see “permission denied” it probably means you haven’t logged out and back in again.

Next, we’ll follow the openstreetmap-tile-server Docker instructions here. In this example run-through I’ll download data for Zambia and import it, but any OSM .pbf file should work.

When logged in as our non-root user, download the data for Zambia into the root directory of the non-root user:

cd
wget http://download.geofabrik.de/africa/zambia-latest.osm.pbf

Create a docker volume for the data:

docker volume create openstreetmap-data

And install it and import the data:

time docker run -v /home/renderaccount/zambia-latest.osm.pbf:/data.osm.pbf -v openstreetmap-data:/var/lib/postgresql/10/main overv/openstreetmap-tile-server import

Obviously “renderaccount” will need to be changed to the name of your non-root user.

How long this takes depends very much on the local network speed. The largest part of the download will probably be actually the land polygons that OSM’s standard style uses to differentiate land from sea; that file is a fixed size regardless of how large or how small the OSM data file you choose to import is (Zambia, used in this example, is relatively small).

One important thing to note - the path to the .osm.pbf must be the absolute path to the file; it can’t be a relative path. Also note that if something goes wrong the error messages may be somewhat cryptic - you might get “… is a directory” if the data file isn’t found. The “time” at the start of the command isn’t necessary for the installation and import; it just tells you how long it took for future reference.

For more details about what it’s actually doing, have a look at this file. You’ll see that it closely matches the “manually building a tile server” instructions, with some minor changes such as the tile URL and the internal account used. Internally you can see that it’s using Ubuntu 18.04, though you don’t need to interact with that directly.

When the import is complete you should see something like this:

Osm2pgsql took 500s overall

real    157m54.159s
user    0m2.098s
sys     0m0.722s

That tells you how long things took in total (in this case 2.5 hours), and how much of that was spent importing data (6 minutes). The second of these numbers is the rough time that it will take to import data again, since the big data files used by the OSM Carto style have already been downloaded.

To start the tile server running:

docker run -p 80:80 -v openstreetmap-data:/var/lib/postgresql/10/main -d overv/openstreetmap-tile-server run

and to check that it’s working, browse to:

http://your.server.ip.address/tile/0/0/0.png

You should see a map of the world in your browser.

Viewing tiles

For a simple “slippy map” we can use an html file “sample_leaflet.html” which is here in mod_tile’s “extra” folder. Edit “hot” in the URL in that file to read “tile”, and then just open that file in a web browser on the machine where you installed the docker. If that isn’t possible because you’re installing on a server without a local web browser, you’ll also need to edit it to replace “127.0.0.1” with the IP address of the server and copy it to below “/var/www/html” on that server.

If you want to load a different area, just repeat the process from “wget” above. It’ll be quicker the next time because the static data needed by the map style won’t be needed.

If you’re not using Centos

Centos was chosen above mainly because the “mod_tile” software isn’t adapted to run there natively. If using Ubuntu 18.04, you can follow some instructions from DigitalOcean here, or you can install it using “apt”. From a non-root account that has access to “sudo” do this:

sudo add-apt-repository universe
sudo apt update
sudo apt install docker.io
sudo usermod -aG docker $USER

then logout and back in again and:

docker run hello-world

and continue from that stage above.

Acknowledgements

Thanks to the authors of all the guides linked to above, especially the Alexander Overvoorde’s “openstreetmap-tile-server” repository Dockerfile in it, and the (many) original authors of the “building a tile server” instructions.

Too Much Information

Posted by SomeoneElse on 20 August 2018 in English.

I’m in the process of changing map.atownsend.org.uk so that zoom level 13 can still be used as a “route planning” layer but walls, hedges and ditches don’t get in the way. This wasn’t originally a problem, but people have since mapped lots of fences, hedges,walls and ditches, and it can be difficult to see footpaths at that zoom level now. Here’s a screen showing half new tiles, half old ones:

map.atownsend.org.uk, after and before

That corresponds to here on the site and here in OSM. The new version will probably be rolled out in a week or so’s time. Other zoom levels will be unchanged - you’ll still see hedges and ditches a couple of zoom levels earlier than with OSM’s “standard” style, and paths will still be legible 2 or 3 zoom levels earlier.